
This is part of the Judge Dredd series of posts. See the Main Article for more information.
Last Update: September 18th, 2015.


Update: September 18th, 2015:
I went ahead and ordered some toe caps from Bawz Props. Make sure you use IC-2000 rubberized superglue to attach these things - none of my regular glues work.
---- End Update
 --- end update
UPDATE - 9/22/2014
I recently ordered some suede for another project and took the opportunity to order some extra to upgrade my boots. In keeping with the build it, wear it, upgrade it philosophy, I am upgrading the boots to have the inside suede heat-shield seen on the Dredd boots.
As you can see, my boots are not exactly the same as above, but I think I can add some suede to give more of the look of the screen boots.

For materials, I ordered half a yard (WAY too much) 6807 Ultrasuede Heavy Weight #6807 Ash from Fields Fabrics. All darkened up, I think that this stuff is pretty close.
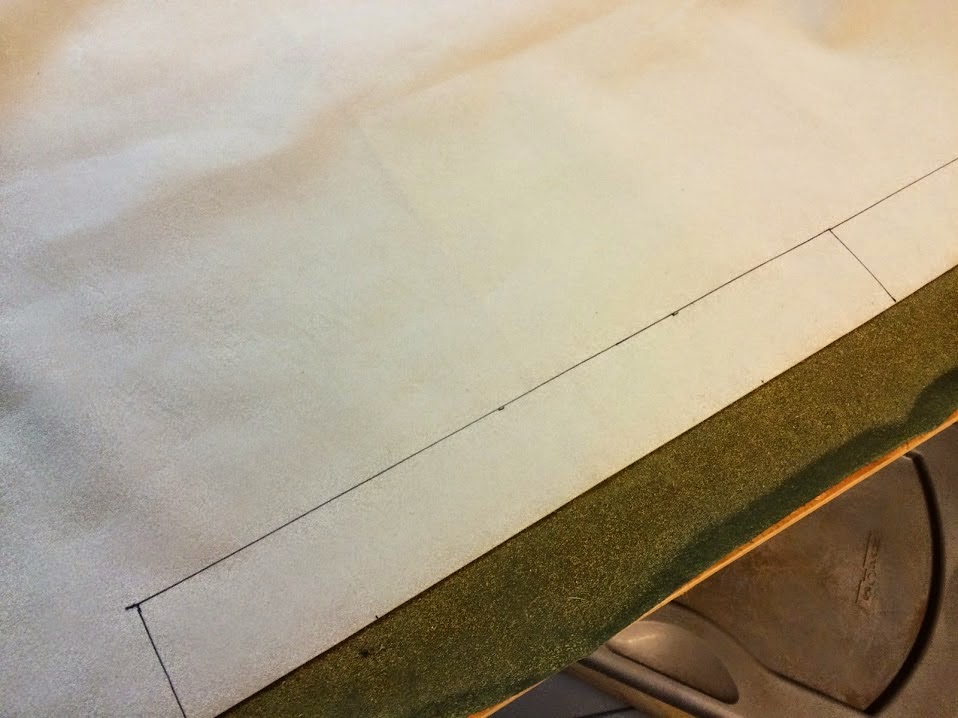
Above, see me making a template. I love to use painter's tape and paper - so easy! Since the area I want to fill is recessed, I simply tape along the edges and push it down with my fingers. Once the tape is good and in there, I use a pen to make sure I get the line correctly. Next, cut out with a hobby knife.
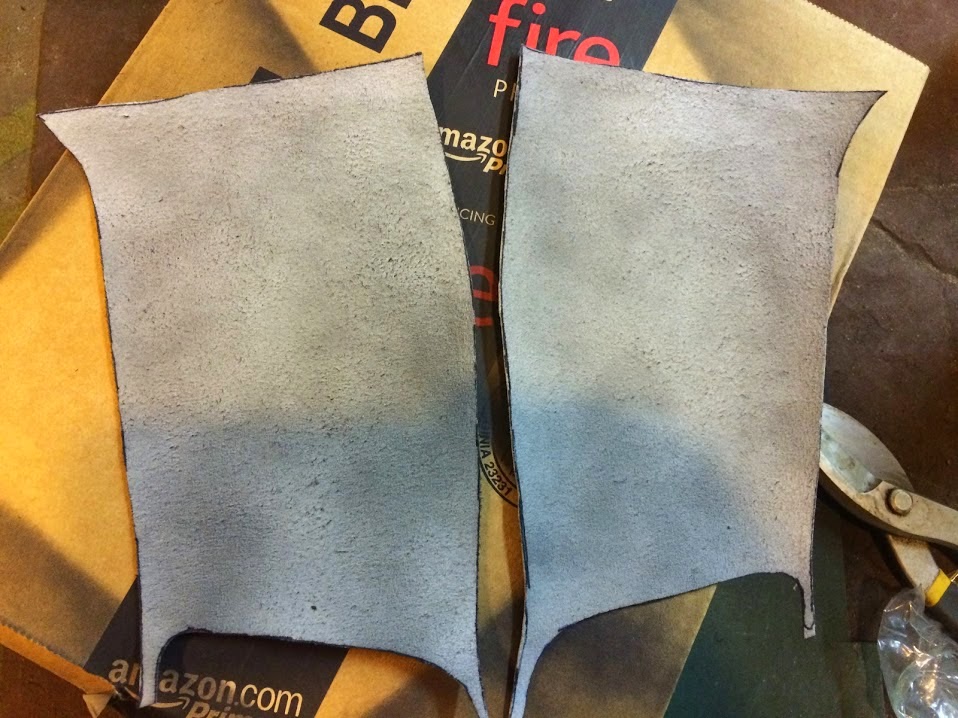
Above, see the two pieces of suede I cut out. I went over them with a little flat black spray paint. I went pretty light, as I can always add more later. DO NOT try to actually burn these black, as that will only ruin the fabric. At least, that is what I hear. >.<

I used hot glue to attach the suede to the boot. I made sure to go lightly and to apply pressure to the suede to keep the bumps to a minimum.
To give a finished look, I cut another piece of suede for each booth. The piece is about 2" wide and 15" long. I made sure to darken them up a lot with the black spray paint, as I think the originals are actually black.

I glued the trim piece around the top. I made sure to stretch out the boot tongue flat to glue the pieces on. I cut the trim as show above to give a more finished look.
Last Update: September 18th, 2015.
The Build - The Boots
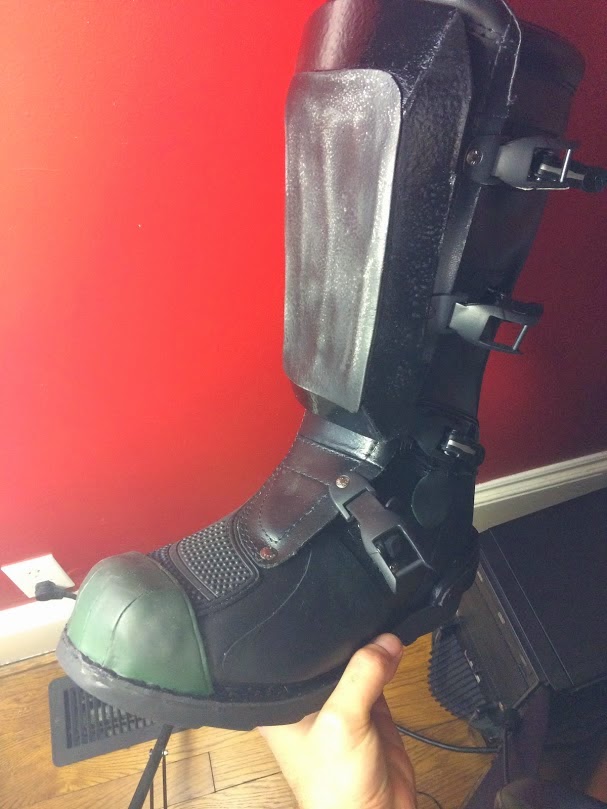
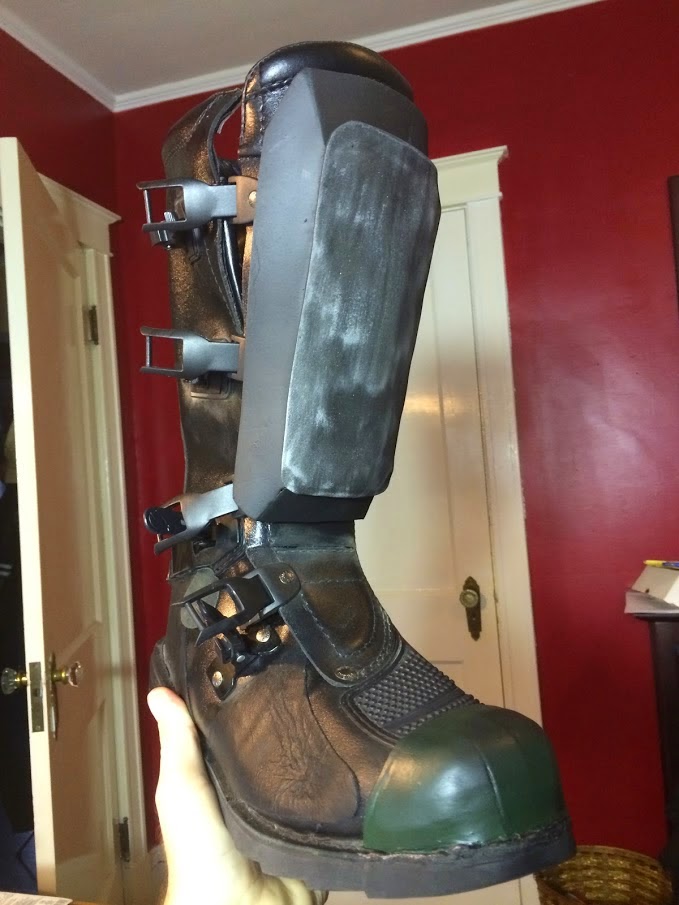
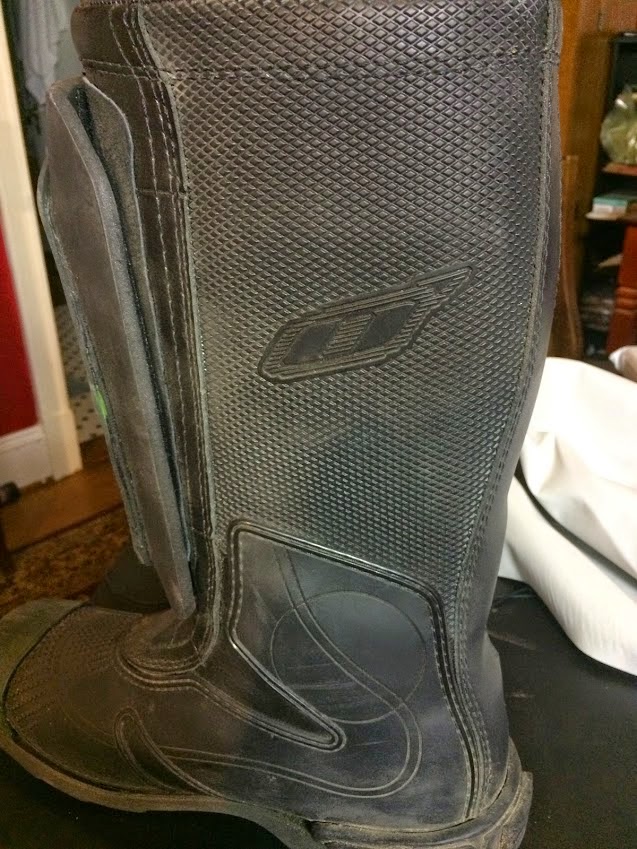
This was going to be a challenge, as there was really nothing available at the time I was building. I believe that some screen-accurate boots are on the way, but I had to scrounge for something. Again, I did a ton of research and settled on some older O'Neal Elements for about $80 on eBay.
The first thing I did with these boots is to rip off all of the plastic and such that did not fit the build. You can see where I cut off areas and replaced them with some cheap leather or suede pieces. I decided not to alter the number of buckles (they should have 3, not 4) as that just seemed too involved. I took my trusty silver sharpie and made the fasteners look more like the screen-used ones.
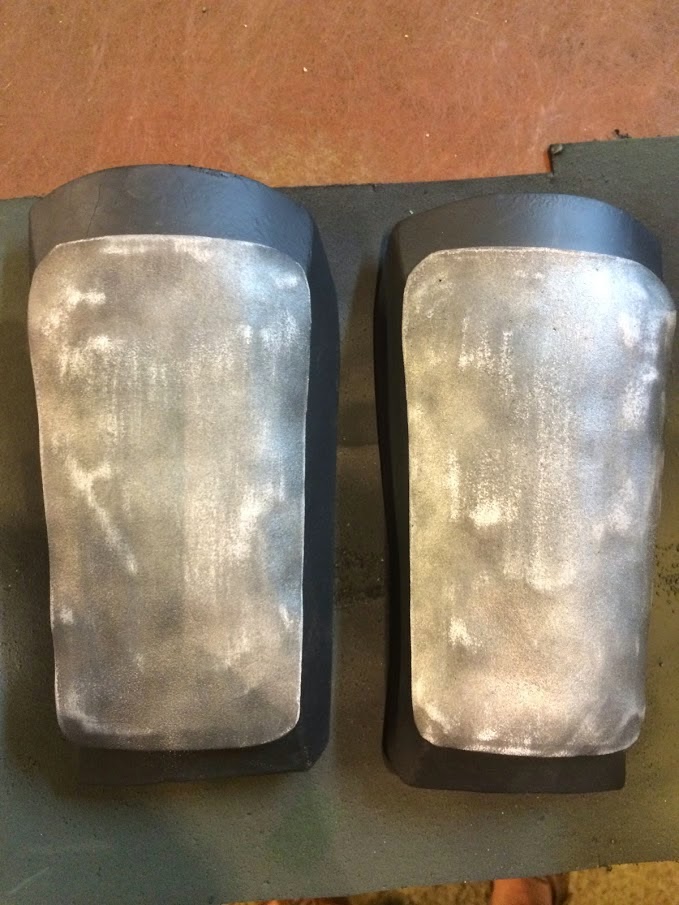
Once that was done, I set about making the heels and toes. The heels were just craft foam cut out to look like what I saw in pictures on the web. I made a paper template and went to town. I hand-sanded the craft foam to get the proper look. I used a ballpoint pen to draw in the shallow lines on the heels. I also found some brass screws that looked good enough to attach to the foam. Plastidip and paint
Update: September 18th, 2015:
I went ahead and ordered some toe caps from Bawz Props. Make sure you use IC-2000 rubberized superglue to attach these things - none of my regular glues work.


---- End Update
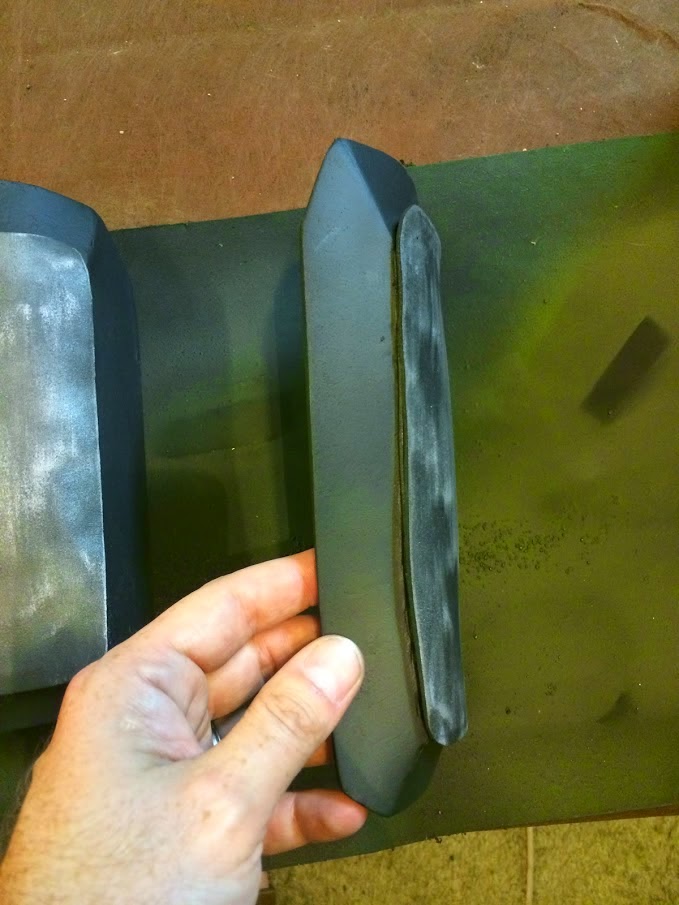
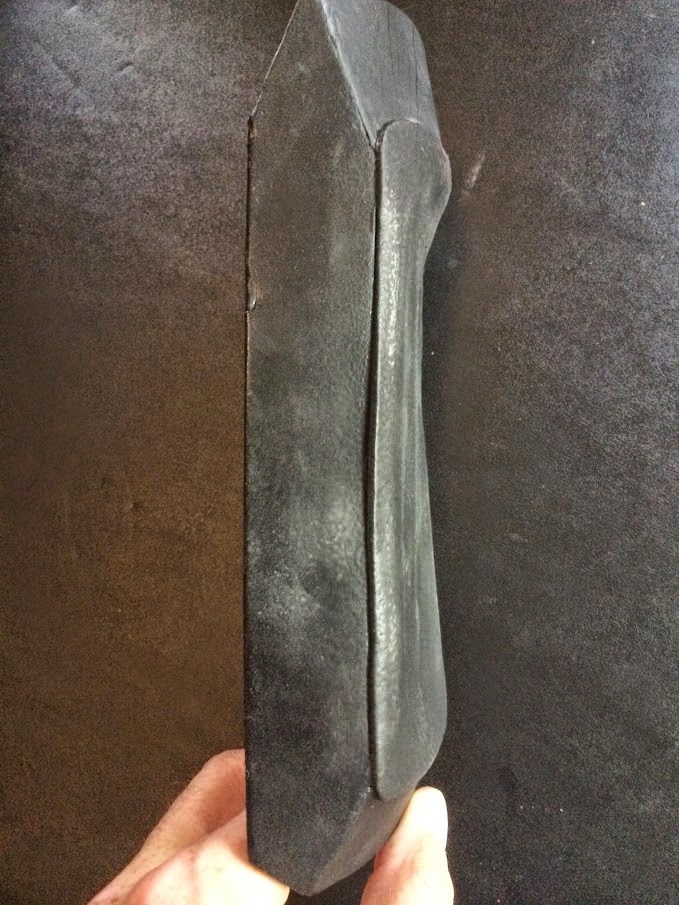
For the shin guards, I used the template in the instructables. This was difficult to assemble and I wish I had a better idea for how to make these. My shin guards look a little concave, but they are passable. I actually ordered some from a vendor, but they were WAY too small for my boots (size 11). After building and painting, I simply used Velcro to attach to the boots.
UPDATE - 8/25/2014
I worked on the shins, and I think I have something acceptable. I built up layers of craft foam to fix the concave surface of the shins. I then added another, slightly larger front piece to look fairly close to the Dredd ones. These are not perfect, but much better.
 |
| OK from this angle... |
 |
| ...terrible from this one. Will be fixing soon. |
I worked on the shins, and I think I have something acceptable. I built up layers of craft foam to fix the concave surface of the shins. I then added another, slightly larger front piece to look fairly close to the Dredd ones. These are not perfect, but much better.
UPDATE - 9/22/2014
I recently ordered some suede for another project and took the opportunity to order some extra to upgrade my boots. In keeping with the build it, wear it, upgrade it philosophy, I am upgrading the boots to have the inside suede heat-shield seen on the Dredd boots.
 |
| This is what the movie boots look like. Picture from Studio Creations. |
 |
| My O'Neal boots. |
Above, see me making a template. I love to use painter's tape and paper - so easy! Since the area I want to fill is recessed, I simply tape along the edges and push it down with my fingers. Once the tape is good and in there, I use a pen to make sure I get the line correctly. Next, cut out with a hobby knife.
Above, see the two pieces of suede I cut out. I went over them with a little flat black spray paint. I went pretty light, as I can always add more later. DO NOT try to actually burn these black, as that will only ruin the fabric. At least, that is what I hear. >.<
I used hot glue to attach the suede to the boot. I made sure to go lightly and to apply pressure to the suede to keep the bumps to a minimum.
To give a finished look, I cut another piece of suede for each booth. The piece is about 2" wide and 15" long. I made sure to darken them up a lot with the black spray paint, as I think the originals are actually black.
I glued the trim piece around the top. I made sure to stretch out the boot tongue flat to glue the pieces on. I cut the trim as show above to give a more finished look.
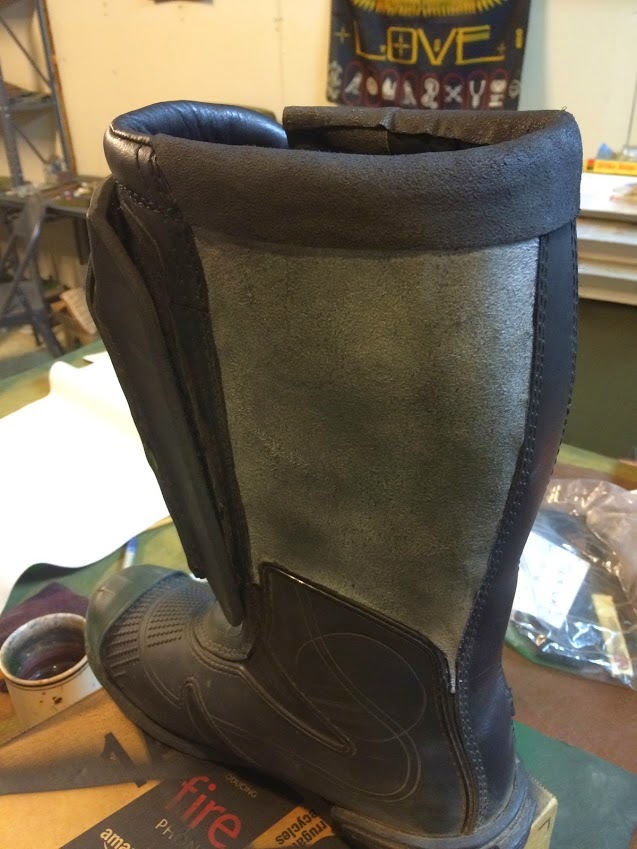
Above, see the finished boot. I will weather and such to make the whole thing match. I am pretty happy with how this turned out. I think the boot looks much closer to screen now.
--- end update
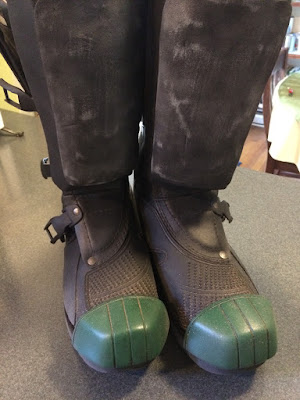
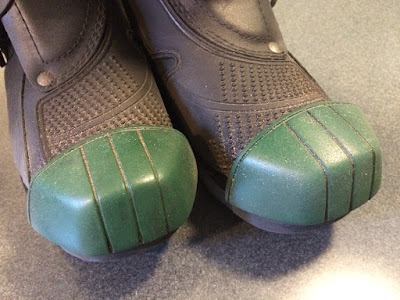
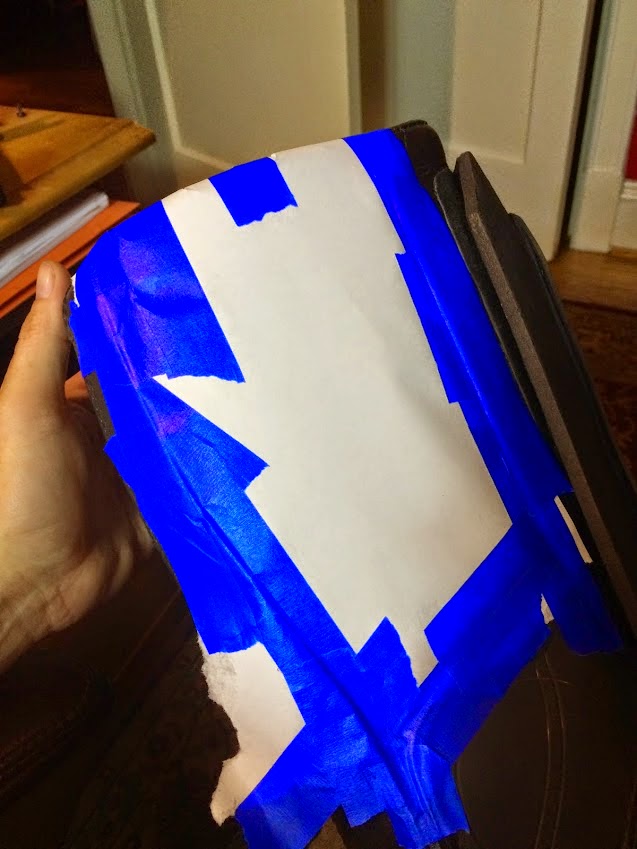
The toe caps were the scariest piece, so I saved it or last. With the shin guards being too small, I figured anything I ordered would be too small too, so I decided to make these. I needed a pattern, so I used blue masking tape to create a toe cap on the boots. I just put on layers of tape over the toe until I was 3-4 layers in. I then took a razor blade and cut away tape until the toe cap looked right. Next, I used a sharpie to draw in the panel lines as seen on the Dredd boot.
After peeling off the tape, I cut along the lines I drew and had my pattern. I used the templates to cut out 2mm craft foam and heat-shaped to fit. There were some gaps between the foam I cut and the soles of the boots, so I just cut out several strips of craft foam to fill in the open spaces, building up with layers. This created a much better base to glue the caps on.
Hot glue was used to attach to the boots. I then used a ballpoint pen to create the line around the top edge. Seal with white glue and paint (after masking). I used the Hunter Green paint suggested, but I found that to be WAY too bright. I went back and misted on some flat black until I got the shade I wanted.
I feel like the toe caps and heels are still a little soft. I got some gouges on them at my first show, so I will be looking to strengthen them. I think I will try another couple of layers of white glue. Maybe I will mask again and hit them with some plastidip.
Comments
Post a Comment